 How to make your Vinyl sound better. Old or new, crackles or scratches it does not matter because the sound from Vinyl is the best. But, How to make your Vinyl better? After the post that I wrote a couple of days ago, one of my terrific friends said to me: And why don’t you tell people how they can make their Vinyl sound much better. The way is just by using cables and cords, and I said yes. And that is an excellent idea and so I am writing.
Vinyl sound better
The first thing we need, of course, is a Turntable, and it does not matter if it’s old or new because the same stuff always is done. And the things I will show you are done too many turntables. Also, some were old, and some were new. And costing more than a mini car but in each everyone got a much better sound.
The Pre-checks
Before we start, I would like to explain this done with any type of turntable. And you must ensure that you have your turntable set up correctly. As this is the first thing to do. And make sure that the turntable is absolutely level by using the right spirit level. Because a few people that I have spoken to were unaware of this basic fact.
Also, please make sure that your tracking is correctly set. Please check your anti-skating and make sure that your tonearm is level when playing the record. Also please verify your cartridge is correct in all ways and that your counterweights are proper.
Three items
 This first picture is of three items. And the first two are hard wooden blocks. Taken from one wooden block, and I usually use three. And put them under the turntable legs as they help to reduce vibrations.
The third item in the picture is a “spike” which is from a Norwegian company called sound care, and these used, but when used, they must be put directly underneath the turntable base as these now become the legs. The spikes remove all vibration and noise transmissions and are quite frankly the best thing that you could ever use to help your Turntable.
 The second picture is of a pair or Interconnect cables, and these are something often overlooked in a system. What I have done is to remove the original cables from the Turntable and replace them with two female RCA sockets which have allowed me to use two excellent quality interconnect cables. The source is the most import item in the chain, and the interconnects are the second.
Power cable
 The third picture shows a power cord but not the original thin, flimsy two-pin cable that comes with the turntable but a suitable high-quality power cord. I have removed the original power cord and fitted a female three-pin receptacle so that I can plug the replacement power cord into the Turntable. And, allows good power to be fed into the turntable to drive it better and give it a better capacity to operate.
I know what you are saying to yourself right now – this guy is strange. And we are only driving a motor so what difference will a suitable power cord make to the sound of our turntable! I have been down this road so many times with different people. And, I do not go into hours of discussion and write many pages so please just trust me on this point.
What was done
What I have done was to take an old turntable and make it sound great. How? Just by doing three things. The first was to place “SoundCare” spikes under the base, and I used three because it always works better with three. The second was to cut the original interconnect and replace it with a good quality interconnect.
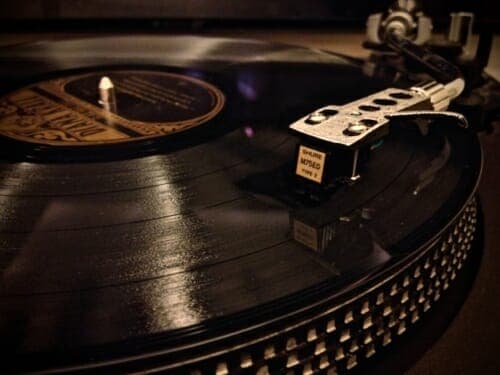
The third was to remove the original power cord and replace it with a suitable quality power cord. These changes have been made just to show you how easily done with an old turntable. This particular turntable that I used cost 50 Euros and had a Shure cartridge with it and worked very well. After the three things were done, it was in a completely different league, and I will keep this turntable because it does sound great and it is good to show people what to do.
The amplifier
The turntable, after all of the three modifications, completed. It was only placed on the top of the testing amplifier as a temporary measure for test purposes. The amplifier you see is a Grundig SV-140 and made in 1969 but is one of the best sounding and most musical amplifiers ever made. Below are two pictures showing the Turntable to amplifier connections. The Interconnect was fitted to the amplifier by a five-pin Din to RCA crossover made by Milty which is one of the best crossovers ever made and was supplied by a company in the UK. The original two core mains cable removed from the amplifier and a high-quality IEC connection fitted inside the amplifier. And, allows a high-quality power cord provided, and by doing it improves the performance of the amplifier in many ways.
I always have a couple of LP’s, which are the same as the CD’s that I carry. I always like to compare with the different system I work. When you have done this a few times, there is still that moment when you switch every component on, and you say to yourself well I wonder how this will sound.
When you hear the music flowing, you know that everything is done correctly as the sound is merely magnificent. And, is because we know how to make the vinyl sound much better!
If you enjoyed ‘How to make your Vinyl better?’, please share – thank you.
Customer comments
Perkune – Best budget Audiophile Cables