WOLFVONLANGA
The system I am writing about is in Vilnius, Lithuania and the loudspeakers were from the WOLFVONLANGA open baffle design. WOLFVONLANGA audiophile set up
The article will describe some of the faults I found in the original loudspeaker positioning and the corrective steps taken. The initial sound I gave a score of 5/10, but after the adjustments, the score was 10/10. The system had been burning in for just over a month. I had been invited over to my friends to listen and give an honest evaluation.

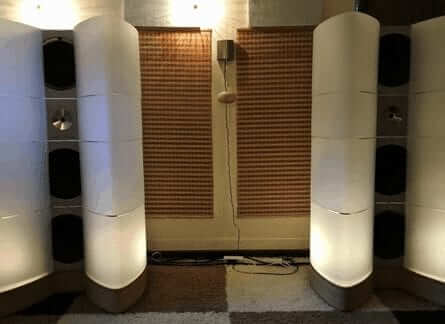
This picture was taken as I entered the listening room. And would be used as the reference setup for making necessary adjustments. WOLFVONLANGA audiophile set up
The loudspeakers were large and may be too large for the size of the room. But I have to say I was impressed by the look and feel of the loudspeakers. I was actually expecting to be literally ‘blown away’.
First impression
I sat down as the first CD inserted. And the music played. But, the sound I heard was nothing like I was expecting. My friend told me he used his computer to set up the system. As you read, I think you will understand what I think about the computer set-up.
The sound I heard was utterly wrong, and everything was out of balance. Also, the bass was booming and overbearing. And the vocal appeared from two-thirds of the way up the wall. The sound stage was small, and nothing was happening in the middle.
Also, small musical details were appearing from the far wall, and there was no feeling whatsoever in the music. The sound was lifeless, and flat without expression. Also, it was apparent that when a note played, it was quickly cut off.
After the CD had finished, a Rod Steward LP put on the turntable. And when I heard the sound, I said: “Rod, what has happened to you?” WOLFVONLANGA audiophile set up
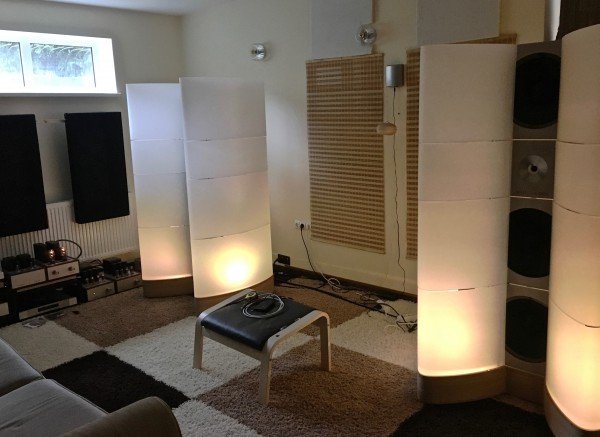
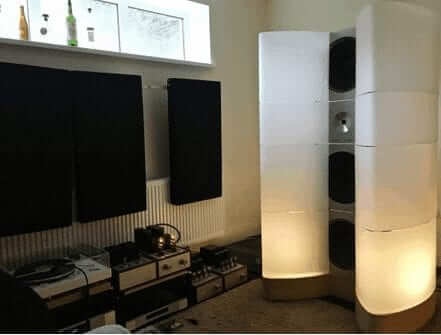
The picture above shows the initial position of the loudspeakers upon arrival. The left speaker was too far away from the rear wall. And too far away from the right-hand speaker. Also the toe-in angle was completely wrong, causing problems. Such as reflections, hole in the middle, loose booming bass and vocals were appearing two-thirds of the way up the wall.
The move
The first task was to move the speakers 25 centimetres nearer to the rear wall and 25 centimetres closer together. And luckily the units were on wheels, and the movement was smooth. Also, the initial position I chose turned out to be very good.
As you can see from the picture, the move was significant in comparison to the room size and listening position. And I wish to point out it is only necessary to move a loudspeaker just a few centimetres. Also, fine-tune by moving just one or even a half centimetre at a time. And by moving the toe-in angle a minimal amount, it was possible to have the vocals exactly at ‘centre stage’. It was lovely to hear Rod where he should be and not halfway up the wall
Center adjustment
By moving the toe-in angle a minimal amount, it was possible to have the vocals exactly at ‘centre stage’. And so lovely to hear Rod where he should be and not halfway up the wall!

The loudspeakers had to have a small toe in which was about one centimetre off centre, and this was enough to make the sound dispersion correct.
Also, the loudspeakers ended up with precisely the same measurement from the left driver centre to the right driver centre. And this measurement was the same as the measurement from the listening position to the centre of the loudspeakers.
Listening

The initial adjustments completed, and we took turns to sit in the listening position to hear the results. And just a few more small changes made, and the system started to sound good.
The bass was tight and vocals centre stage. And the sound stage excellent. Also, the system was now up to 9/10. But something was not sounding quite right. If you remember earlier, I said the notes seem cut off, and there was an absolute lack of life to the music. My friend had many different cables he had collected over the years, and we started to try different combinations. And first the power cords as these are usually the culprits.
The result
Now I am even more impressed with the difference cables make. Because that was all, it needed to bring the system to life. And now the music had feeling and vitality. My friend put on Rod again to hear how he sounded. And everything sounded great. I even found myself singing along with Rod as the harmonies came in! They say there is a first time for everything. And I think the sound from the WOLFVONLANGA audiophile set up got to me in a big way. Rod was real as if he was in the room with us and the music we heard was now a full 10/10
Conclusion
The WOLFVONLANGA audiophile set up was a complete success, and my friend was delighted with the results. And we both agreed the computer setup was far from correct. Also, I was pleased with the results because it gave me another story to share.
And with any system, the first thing you should do is position your loudspeakers. Also, is often overlooked. People spend thousands on their systems but are not getting the full enjoyment. Simply because they ae not told about the importance of this necessary procedure. WOLFVONLANGA audiophile set up
Another item often overlooked is the audio cables. Are your cables suited to your sound system? And have they quality and the build. Also have you checked to see all the power cord polarities are the same? And do your cables add or take anything away from the original musical signal!
If you have enjoyed ‘WOLFVONLANGA audiophile set up’, share with friends – thank you.
Perkune – Best budget Audiophile Cables