 One of the biggest questions asked is how to test XLR cables. Today, I visited my colleague Lukas from ‘Garso Namai’, located Kauno g 31, Vilnius, Lithuania. I have tried a few of the latest amplifiers and speakers over the past six months, and always managed to get excellent results. And, today was no exception because we were testing a new amplifier. The M6S PRX Power amplifier from Musical fidelity
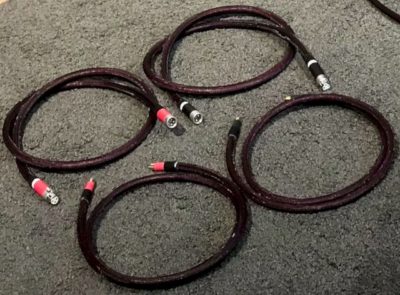
How to test XLR cables XLR
As I entered the showroom, I heard music playing and thought to my self how good it sounded at low volume. I said to Lukas that I liked the sound from the new amp and what he thought. Lukas replied that he was not sure as he had no time to test it as he had been so busy. I replied that I had been active as people spent more time at home listening to their Hi-Fi systems. But, we were to decide just how to test XLR cables I had brought with me. And, also try the new amplifier and pre-amplifier from Musical Fidelity.
XLR cables
 How to test XLR cables, and are they better than RCA cables. Also, does an XLR cable sound any better than an RCA cable? As the XLR cables use a different system, is it worth spending extra money? These are questions often asked, and today we will indeed find out if there is a difference. Is the difference worth the additional cost incurred to run everything ‘Balanced’ as the term used?
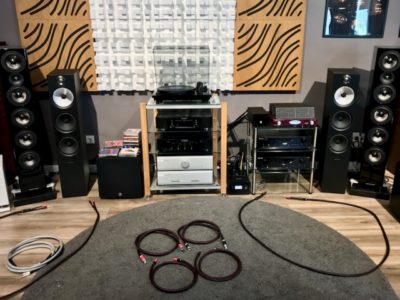
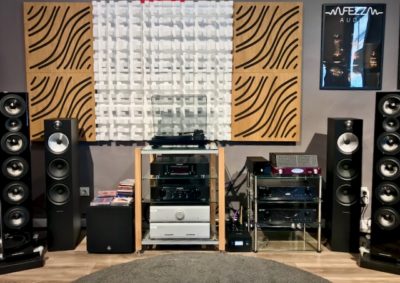
The system
The system we used was a mixture of items. These were high-quality components, including a very lovely sounding turntable, the TURN 3 from Reloop. For the first time, Reloop is proud to present a HiFi turntable specially designed for music enthusiasts and sound purists. The TURN 3 uses a Low-Noise DC Moto. And, belt drive operation is powered by a low-vibration DC motor, keeping unwanted noise to a minimum. The straight tonearm, specially designed for TURN 3, offers optimal tracking performance for a superior sound experience. I love the sound from vinyl because tome Vinyl provides such an open and natural sound. Lukas also had an adorable phono stage fitted and supplied by Gold Note.
Phono stage
 The PH-1 is a convenient high-performance MM and MC phono preamplifier featuring an Ultra Linear Power Supply. It provides superior audio purity within any audio system and easy access to impedance settings. The elegantly shaped box with a black lacquered front panel adds a stylish touch of classic Italian design to your audio chain. And the performance from this unit was outstanding and gave a beautiful musical presentation.
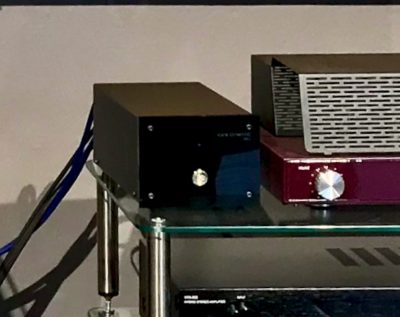
The Power
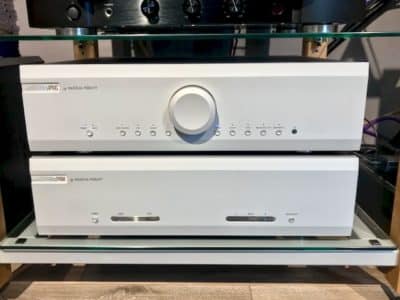
Musical Fidelity supplied the power for the how-to test XLR cables session. The M6S preamplifier and the M6SPRX power amplifier. The M6s PRE is effectively a preamp without limits. Its wide range of inputs, coupled with excellent performance, meaning it can form the heart of almost any system, regardless of price. It’s a pure Class A design capable of driving any power amplifier over any length of cable.
The M6s PRE has an array of inputs suited to both traditional and modern music sources. It has an MM/MC phono stage, two balanced inputs, three line-level connections. A fully configured tape in/out loop and a digital USB socket. There are home theatre bypass options on both balanced and line-level inputs. Performance is stunning. The M6s PRE sounds sweet, straightforward and fast, with tight, extended bass. No wonder that in his Hi-Fi+ review of the M6s, Alan Sircom praised the M6s PRE for being “both excellent and excellent value for money.”
The Loudspeakers
The loudspeakers used for the How to test XLR cables were supplied by Acoustic-energy as we had tried these a few weeks earlier. The Acoustic-energy AE520 loudspeakers are powerful, slim-line, floor-standing loudspeakers. Build on the AE500 and AE509 models to establish themselves as the brand’s new flagship. And they are firmly featuring multi-driver design, imposing size and performance. Also, it features two dedicated 125mm mid-range drivers, three low-frequency drivers and a 25mm tweeter, which are fashioned from carbon fibre to provide perfect tonal matching across the frequency range.
The two dedicated 125mm carbon fibre mid-drivers include new oversized 35mm voice coils, low thermal compression and optimum motor force. Both mounted within their dedicated sealed enclosure. The three dedicated low-frequency drivers are reflex-loaded by a large rear-facing rectangular port and designed to match the Pistonic power and accuracy of our legendary ceramic aluminium drivers. These new units offer much-improved self-damping for a smoother, more transparent sound. Also, Vertical directivity optimised to provide excellent vertical coverage. Whilst reducing the energy otherwise wasted on ceiling and floor reflections when compared to traditional designs.
Listening
 For the XLR/RCA testing, we decided to use the Album ‘Point’ by the world-famous duo ‘Yello’ because of the excellent way the album’s mastered. And, actually, ‘Point’ is my favourite album. We did the first thing to listen to the system to get familiar with levels and just how it sounded. I will say that I was impressed and surprised by how smooth the sound was. The soundstage was impressive, and the instrument separation excellent. The bass was deep and details superb, and you could hear the expression in the music very precisely.
Clean up
From experience with testing, I knew the system could sound better. And, we installed a pair of Perkune Matrix speaker cables and listened again. This time the music we heard sounded so much better in every way possible, so we decided to start our project, which was How to test XLR cables. I had brought with me a pair of Perkune Reference RCA and a pair of Reference XLR cables. And so, we installed the RCA cables and ran the first test. And, what a difference we heard. More dynamics, more separation allowing a richer and fuller sound. We were so impressed with the sound and both felt it was amongst the top three we had ever tested.
Comparison
Now it was time to test the XLR. And it was done by the flick of a switch on the rear of the preamplifier. The music played, and Lukas pressed the switch. And, the result was simply unbelievable. The shock was upon us at the difference in sound, so Lukas flicked the switch to hear how it was before and then back to the new position. And yes, this was now in another league. All I could say was what the hell has happened. Because the sound had increased in every way possible, there was more volume, better clarity, and you could hear the spit from the performer’s mouth as they breathed in and out. The sound stage was the best we have ever heard, and the room became as it’s electrified!
There was so much energy, life and presence as the music just pounded into space, and Yello was clamouring to get out into the room with us. I will say that we were – Gobsmacked with the new sound. And both agreed that the XLR connection gave about a 15% increase in performance over the RCA. The question asked earlier was answered. Can a difference be heard, and in this instance, the answer is a big fat YES. And, the second question regarding the extra cost and was it worth it. The answer is another big fat YES.
If you have enjoyed reading, ‘How to test XLR cables’, please share with a friend – thank you.
Author: Paul A. Goodwin (Perkune audiophile cables)
Dated: 03/04/2021
Perkune – Best budget Audiophile Cables